Don’t get caught in Limbo. Use our guide.
The design of Limbo is presented in grayscale and features a silhouetted character. While the 2D look of this XBLA exclusive is simple, its puzzle-platform gameplay is anything but straightforward. On top of that, its “No Point in Dying” Achievement requires beating the game in one sitting and dying five times or less. That’s where we come into play. Use our step-by-step walkthrough to guide your lost shadow character so that he doesn't die as often or, as the name implies, get caught in limbo as you try to figure out how to advance through the game’s 24 mind-bending chapters.
Chapter 1
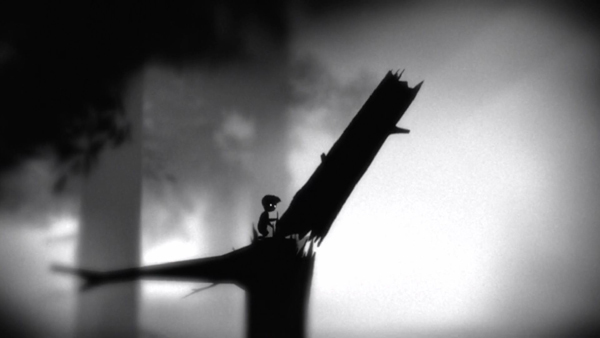
Starting a new game means waking up in a dark forest and immediately beginning the first chapter; no story, training or breaks between chapters occur along the way. Before you begin your endless trek to the right in this side-scroller, walk left to earn the “Wrong Way” Achievement.
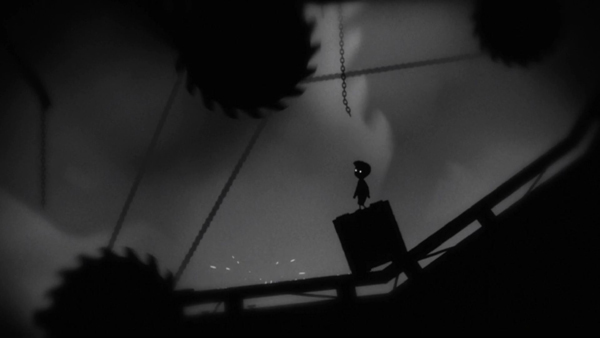
 Mine Cart
Walk to the right and jump off the edge of a toppled tree trunk, landing on the hill below. You’ll want to avoid the first of many pits because it’s full of deadly spikes. On the other side of the pit is an out-of-reach platform and, underneath it, a mine cart. Press the X button while holding the left analog stick to the left to pull the cart as far as you can. Don’t worry about pulling it too far since it’s anchored by a rope. Climb onto the cart with the A button (jump) and press A once more to jump onto that previously out-of-reach platform.
Grab the adjacent rope by simply jumping toward it. Your character automatically latches onto ropes that are in close proximity. Make your way down to the attached, swaying plank at the bottom and jump off to the right. The right ledge is farther away than the left one (the safer way to jump across), but you won’t die by jumping from this height. However, a word of caution: Your shadow character is extremely vulnerable when it comes to drops that are any larger than this one.
Sailboat
Next, you’ll see a sailboat sans the sail. Thankfully, it still drifts along the water, so jump in and wait for it to stop along the right bank. You’ll notice that there’s a handle on the front of the boat, which means you can hop out and grab it with the X button to pull it ashore. From here, use it as a platform to access the ledge to the right. There’s a hard-to-see ladder to the right wall of this ledge. Scale it and jump to the rope on the left and climb that. At the apex of the rope, there’s a tiny jump to the cliff’s edge and a long walk to the right.
Foothold traps
The long walk to the right is meant to lure you into running, but look out for two foothold traps. The jaws of these nasty, easy-to-miss devices will chop you into little bits, so approach them with caution and press the X button to separate them. Spreading the footholds apart allows you to hop over them one at a time.
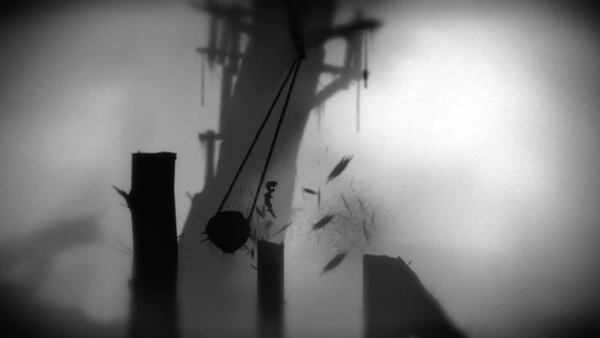
Rotting carcass on a rope
While the foothold traps you just passed remain empty, hunters apparently strung up some sort of animal, now dead and rotting on a rope. The thing is, you need that weighed-down rope to swing free across the valley so you can get to the high ledge to the right. The trick is to jump into the valley, drag a nearby foothold trap from the right side of the screen to the left and place it underneath the rotting animal. Hopping onto the rope this time puts the carcass within reach of the foothold and causes the jaws to shut violently - as if the animal hasn’t been through enough. Oh well, the rope can swing a little bit higher now and you can be on your way.
 An Indiana Jones moment with a boulder
The developer really likes to calm your nerves with painless walks through the forest and zero signs of danger. Then, out of nowhere, it drops a dangerous obstacle in your path. In this case, it attempts to drop a boulder on you. As soon as you see a fallen tree platform, carefully walk up half of it, prepared with the foreknowledge that you're about to have a “Raiders of the Lost Ark” moment. It falls from the right, down the diagonally laying tree trunk, so run back to the left. You’re safe when it falls into a nook.
Chapter 2

Climb over the boulder that’s now entrenched in the ground and move to the right until you find a box in front of a small pool of water. Instead of trying to cross the water by floating on the box, drag it backward until it rests between two large trees, one of which has a rope that’s now within reach. Climb the rope halfway so you gain a little height, yet are still able to work up a swing by pressing the left analog stick from side to side. With enough momentum and correct timing, you can make it to the lowest branch to the right. When on top, jump to the slightly higher left branch and continue walking that way to jump to the leftmost branch stub. The final platforms in this tree-scaling puzzle are to the right and lead to a clearly broken treetop.
With a slight, and we mean very slight push, the broken treetop falls to the ground and becomes your bridge across the small pool of water. Whatever you do, don’t break the treetop and follow it down to the ground expecting to survive the fall. This is one case in which taking extra time to backtrack through the platform maze is required. There’s also an “Altitude is Attitude” Achievement to the top left to boot. You’ll need a good running jump off the tree branch platform you’re currently on to reach the rope hanging to the left. That’s the easy part. Climbing this rope and jumping from the top doesn’t quite get you to the left branch stub. Neither does swinging the rope and jumping from the bottom. It’s tempting to try either method because the glowing dot signifying the Achievement is within sight. Combine the two by first gaining swinging momentum at the bottom and then speedily climbing to the top of the rope to reach the Achievement-holding platform.
On the ground, approach the fallen treetop and set it afloat by pressing the X button while holding the left analog stick to the right. Once it’s halfway into the water, you can jump across the pool with little effort.
Chapter 3
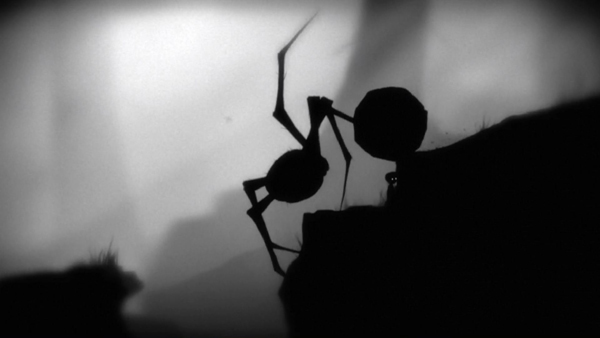
 Foothold for Spider Legs
Moving to the right, you’ll see a foothold resting on a branch at the top of the screen. It’s out of reach, so keep moving to the right until you approach a giant tree spider. Using yourself as bait, run under the spider’s legs and force it to pound the ground in a stabbing motion. Do this twice without being hit and the foothold will slide off the branch and land on the ground. Drag the foothold to the spider and lure it into pounding its legs into the jaws of this all-of-a-sudden helpful contraption.
Chapter 4
Spider’s Revenge
Following the path to the right leads to an unavoidable web that you get caught in and a spider that spins you into a silk mummy. Don’t worry. You’re not dead, just horribly, horribly inconvenienced. Hobbling through the remainder of the chapter, you’ll encounter three bottomless pits. The first two look challenging, but aren’t difficult with proper timing. Meanwhile, the last pit of the three appears to be the easiest, but it throws an obstacle (a falling tree) in your lap. It falls as soon as you move a boulder out of the way and into the third pit, breaking off the adjacent long tree trunk and causing it to fall toward your mummified body. The only way to survive is to immediately retreat after the boulder gets rolling toward the third pit. Once that’s done, hop onto the now-vertical tree trunk and get ready for an even harder boulder exercise.
Rolling Boulder
A large boulder sits to the right of the next ledge and, as soon as you see it, you know what painful gameplay lies ahead. Jump on the right side of the boulder to begin rotating it clockwise. While it’s obvious that you don’t want to get ahead of the boulder-platform and fall into the trench, there’s a giant spider chasing you from the left, hastening your rotation (and, most likely, demise). Thankfully, passing this area frees you of your web-spun cocoon with a fall down the next hill.
Ropes with traps
You’ll see an NPC in the distance, but it’s not a hopeful sight upon further inspection. The ground falls from beneath you and, in the process, hangs the NPC due to a previously unseen rope. Luckily, you survive the drop. There’s a rope to cross the next ledge, but it too has a trap in store. Grab onto the rope briefly, but instantly jump off and clear the area. A strip of spikes will fall. Once that deathtrap is out of the way, however, return to the rope to swing to the high ledge on the right.
Chapter 5
 Treetop platforms with, you guessed it, traps
There are a series of tree-trunk pillars that simply require leaping as far as possible until you see one with a diagonal stick. It’s holding up the broken piece of a tree trunk. Jumping onto the stick causes it to shatter and the broken piece of the tree trunk falls in your direction. Retreat to the previous platform to avoid being crushed and use the fallen tree trunk as a bridge to the next platform. Be careful, though; the next tree trunk platform collapses by falling to the right. Use it to your advantage by waiting on this moving platform for two seconds so that you can easily make it to the next set of platforms.
Heads up! The low tree trunk platform after that initiates a swinging boulder trap. Time your jump to be about three seconds after landing on the low-level platform and you should miss being obliterated. The final pillar slopes into a bunch of spikes, so be sure to avoid them as you slide down and jump onto solid ground to the right.
Fake Spider legs and flaming tires
There’s a set of spider legs that resemble the tree spider you defeated earlier, but they’re fake. An NPC is on the other side pulling a lever to make the legs move. When the leg barrier is up in the air, simply cross under and continue your journey.
Jump over the next gap, but be prepared to jump back across in a few seconds. A flaming tire will be hurled in your direction and the only way to avoid it is to have it fall into the gap while you watch from the other side. As soon as it falls, however, run to the right before another tire is thrown at you by NPCs. They’ll be able to get off a tiny tire, but you can jump over it and find safety under a ledge before the next full-size tire is hurled.
Chapter 6
 More NPCs attempt to make your dark adventure even grimmer after you climb up the next two ladders. Cautiously move to the right until you trigger a foothold tied to a rope. It swings from above, left to right. Move back to the left a a little bit to avoid the diagonally swinging foothold. Once it passes, you’ll have a brief window in which you must pivot back to the right because there’s a second swinging foothold that’s tied to a rope. It swings from above, this time right to left. This is a delicate operation that requires both expert timing and luck.
Once both footholds are out of the way, don’t continue to the right by jumping the next gap. The first foothold landed on the other side and, just to make sure you don’t make it across, the developer planted a second foothold right next to it. Lovely. Instead, take the rope to the left that the second foothold was tied to and move to the right across the next three platforms.
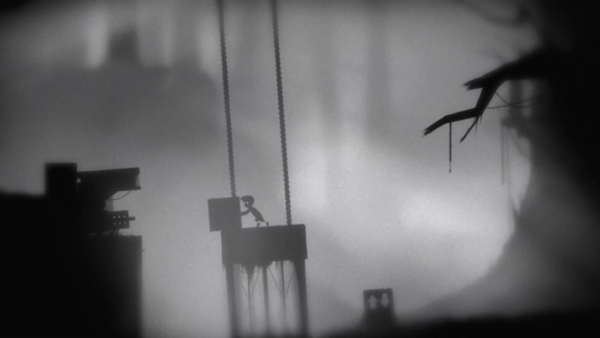
Spider Seesaw
You’ll come to a log that you can push out onto the next pool of water, but don’t dilly-dally because, surprise, a giant spider is there to hasten your platforming peril. As soon as it’s halfway between the left edge and a tiny rock that’s jutting out of the water, jump to that rock and quickly jump again to the right. You’re not done with the spider just yet. Use the spider’s weight on the tree trunk that appears to be a seesaw. Stand on the right side while it approaches you, and inadvertently lifts you up, from the left. Lean against the next tree trunk you see so that you can use it as a platform to jump across the subsequent gap. From the other side, you can safely watch the spider attempt and fail the jump.
 Spider, meet boulder
There’s a stick holding up a boulder on the next slope. Break it and be prepared to run to the left. Take shelter by jumping down to the ledge below and pressing up against the right wall. Not only will the boulder miss you on the right, but it’ll also wipe out the spider as it attempts to crawl back up from the gap on your left.
Last Leg
The spider is on its last leg, literally, at this point. After you walk to the right for a little while, you’ll approach a gap containing spikes that’s too large to jump. That’s when the spider shows up with just a circular body and a single leg. You need the body to cross the spike-filled gap, so tease the spider into making that stabbing motion with its leg and run up to it while pressing the X button. Pull to the right to tear off the leg and, once it’s separated, roll the circular body to the right until it rests against the spikes.
Chapter 7
Jumping across the now-passable gap, you’ll see two boxes hanging in the air. Reach them by running down the adjacent hill and climbing the ladder. Jumping up on top of the leftmost box will break the rope’s hold and, once you push it down the hill, it’ll allow you to continue to the high right edge.
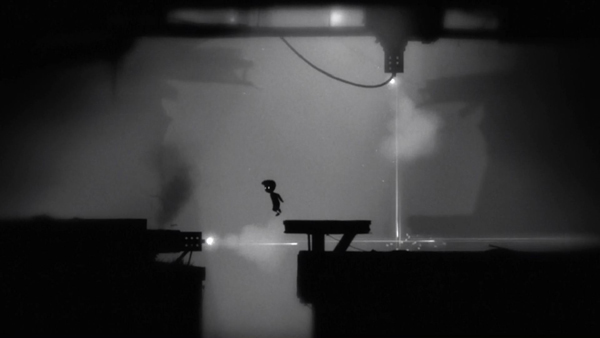
 Floating bodies and body-crushing platforms
You’ll see two dead bodies floating in the water. Jump on the first, but wait until an NPC walks from the right and drowns in the water, right in the middle. He’s your ticket to making it across the pool. You don’t really need to jump on the rightmost body since it’s so close to the now-reachable solid ground. However, you’ll need to drag that third body to trigger the next trap. Drag it to the right and push it into the next ditch containing the trap-triggering rope. A rectangular block falls from the air and you can cross on top of it instead of being crushed underneath of it.
More platform-crushing obstacles come from the sky when you venture right. You’ll see a menacing platform in the air with what appears to be a button on the ground. Jump onto the button while avoiding the ground area around it. This ensures that the platform doesn’t slam down upon you. The next midair platform works the opposite way. Feel free to touch the ground around the button, but avoid hitting that trap-triggering raised strip of land in the middle.
Remember which body-crushing platform does what because you’re going to have to retreat as soon as you see three NPCs with poisonous darts across the next gap. As they chase you, the first will fall into the spiked-filled gap, the second will trigger the second trap and the third will set off the first trap.
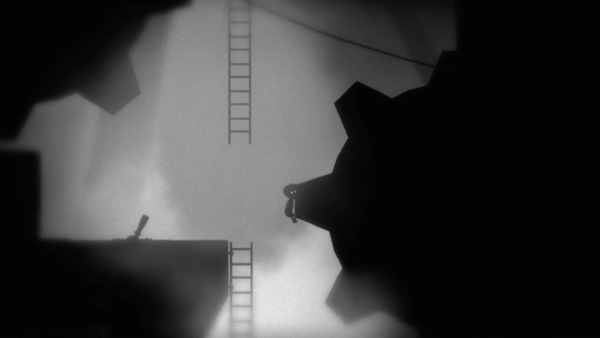
Chapter 8
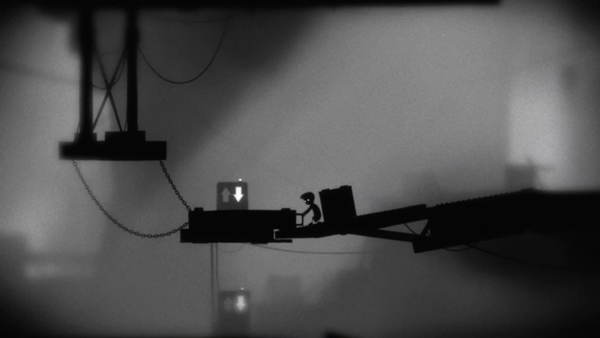
 Lifting weights
Shimmy down the next ladder, pull the mine cart from left to right and scale the ladder to weigh down the nearby rope. This’ll raise one of two rectangular weights blocking your path. Don’t let the two deadly saw blades below the rope cut you up, however. When the rope is weighed down as far as possible, jump off to the left and quickly try to catch the other end of it at the bottom, underneath the dual saw blades. Use that mine cart to reach the rope as it attempts to recoil at the top. This may take a couple of tries, as you want to avoid meeting up with those saw blades. Once you catch the end of the rope, it’s a matter of swinging to the adjacent rope and weighing it down to lift the second rectangular weight halfway. Once the two weights are parallel, one on its way down and the other on its way up, let go and run to the right before they both fall on your head.
 Your brain-altering bug "hat"
The next obstacle is a brain-altering… bug. This unavoidable, reoccurring gameplay element causes you to travel in the opposite direction until you reach a bright light that has managed to pierce the forest canopy. In this case, you are forced to travel to the left until you see sunlight, then you’re forced to continue traveling to the right.
Jumping from a hill and avoiding a bottomless gap, make your way over the box without pushing it to the right. After all, you want to push it to the left, so continue being forced to march right until more sunlight switches your direction. Once you’re forcibly traveling left, push the box until you’re underneath three bird-like creatures. Apparently, they eat funny-looking brain bug. Jump on top of the box and toward these creatures. With the help of that box, your bug is within their reach and your ability to navigate is once again in your hands.
Chapter 9
Hamster
Walk past the non-working lever and the motionless gear until you see a four-legged animal scamper to the right and into an inaccessible tunnel. You’ll need to lure it out to put that gear in motion by having it do what your childhood hamster never did: run in the exercise wheel. To chase it into the gear, jump onto the platform near the tunnel that looks like it has food hanging from underneath of it. With a couple of jumps, the food will fall and the animal guardedly ventures out into the open. Jump down on the right side of the hamster-like creature and chase it into the gear. Pull the lever and hold it down for a couple of seconds until it begins to rain throughout the environment.
Canal
While flooding waters abound, utilize them to solve your next puzzle. There’s a broken canal above you that can be fixed by weighing down a rope. Before fixing the canal and filling up the valley to the right, hop into dry valley and pull the right-lying log to the left so it’s in the middle. Jump on top of it to reach the ladder to the left and climb back out of the valley. Pull the string you skipped so that the canal is fixed and the now perfectly placed log is floating in the middle. Jump off the rope and hurry across before the valley water recedes.
Chapter 10
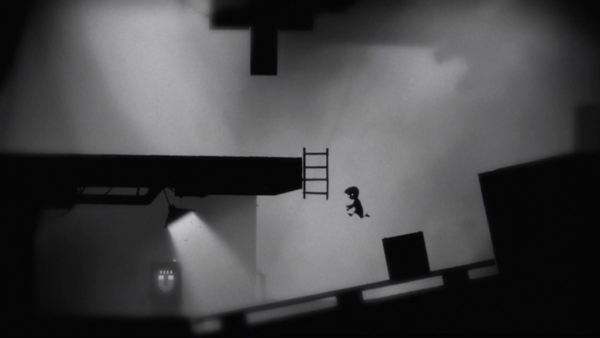
 Trap Door, Rising Waters
After climbing up the next ledge and running down the subsequent hill, push the box you see to the right until it’s beneath the closed trap door above you. Climb the ladder and open up the trap door. Yes, there’s a lever on the ground next to the bottom of the ladder, but don’t flip the switch just yet. Open the trap door first. You’ll see why in a second. Once the trap door is opened and you climb down the ladder, make sure the box will clear the opening. Flip the lever from right to left to commence an immediate rise in water. Quickly scale the ladder and jump onto the box as it floats to new heights. The box will meet its end thanks to several uninviting spikes, so you don’t want to stay on it for too long. As soon as you can reach the next ladder, jump to it and proceed to pull the next box from right to left. Don’t pull it all the way to the left; just outside of the path of right ledge. This box is heavier, so it won’t float all the way to the ledge that you want to reach. You’ll have to jump as soon as you’re within cliff-hanging distance.
Trap Door #2, Balloon
Run down the next slope, jumping on the middle platform that you see. Open up another trap door, allowing a balloon-like buoy to rise to your location. Stick by the handle of the trap door because as soon as the buoy jumps up, you’ll want to close the trap door to prevent it from falling back into the water. Roll the buoy to the right until a tiny slope gives it some natural momentum, then waste no time in climbing the ladder to the left to reach the highest platform level. Jump onto the loose set of boards to the right, which should float with the buoy underneath it.
Water leveler
Skip the next ladder you see and pull the lever in the small tunnel to let the water flow from the left room to the right room situated above you. But, before it finishes equalizing the water in the two rooms, cut off the flow by flipping the level back. You want a slightly higher amount of water in the rightmost room. Climb the ladder and hop onto the now-floating block and onto the next platform boasting a second lever. Flipping this switch lowers a chained block into the second water-filled room, raising the water just enough to float a pinnacle block to venture out of this puzzle.
Chapter 11
 Brain-altering bug #2
You’ll receive another brain-altering bug on the next platform, but before subjecting yourself to this direction-altering nuisance, pull the box to the left and jump on the other side of it. When the brain-altering bug forces you to move from the right to the left, you’ll want to be in position to move that box left, too. When it’s as far to the left as possible, jump onto it and jump again to the cliff’s edge. On top of the cliff is direction-altering sunlight, which will send you back on your way to the right.
Jump to the two ladders, but avoid intermittently pouring water in between them. Scale down the second ladder, and complete a series of jumping exercises until a pipe platform bursts underneath of you and more sunlight changes your direction from right to left. Run back to the pair of ladders. Eventually, you’re going to want to climb the rightmost ladder all the way up and ride one of the floating platforms from those jumping exercises to a high right cliff. But you have 35 seconds to wait and your character is forcibly moving right to left. Move across the ladders, on top of the box and into the sunlight on the cliff to get oriented in the proper direction. Go back to the rightmost ladder, climb to the top and wait for the platform to rise. You’ll have more than enough time to do this with 35 seconds.
A word of caution: don't jump on the floating platform right away, as it’ll be rocking back and forth after popping up from the water. Additionally, the high right cliff isn’t reachable just yet, so let the water rise a little more and jump at the last second. Moving hastily when you’re so close to the end is easy to do, but it negates all of your progress in this tense puzzle challenge.
This marks the end of the brain-altering bug, as more bird-like creatures confiscate it from you. But, there’s an Achievement lurking in the area, specifically the “It’s Stuck” Achievement. The flood stops when there’s a shallow pool of water covering the ground you’re standing on. This means you that can drag that floating pipe platform to the right. When you can, jump over the pipe to transition from pulling it to pushing it and float it off the bottomless gap that lies all the way to the right. There’s a hard-to-see chain to your left that you can reach via the pipe platform. While you could reach the chain without pushing the pipe all the way to the left, the glowing Achievement falls into the bottomless gap to the right of the chain. Luckily for you, we told you about floating the pipe platform a little ways into the bottomless gap to catch the desirable Achievement.
Chapter 12
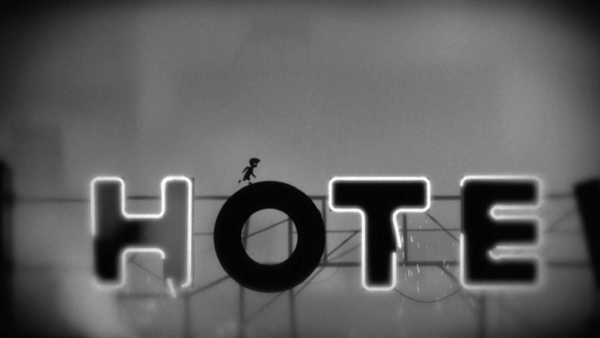 H-O-T-E-L
After moving up the nearby ladder and scaling a loose drainage pipe, you’ll find a neon sign that spells out H-O-T-E-L. The H lights up with electricity every five and a half seconds. You’ll want to jump on top of the H at the tail end of its neon spark and jump onto the dormant letter O before the H lights back up and electrocutes your character. The O shifts with your weight and knocks into the letter T, releasing a clutch rope that you can use to swing past a gap underneath the H-O-T-E-L sign. Turn off the electricity, swing back across the rope and climb up a drainage pipe to cross the topside of the letters. Look out for the loose L and the collapsing neon arrow symbol at the end of the sign.
Glass Ceiling
Beyond a ready-to-crack glass ceiling, there’s a cart with a ladder attached to it. Because of a slight slope next to the ceiling, it’s impossible to simply push the cart to the left, climb to the ladder’s highest point and crash through the adjacent ceiling. Instead, push the ladder cart to the right. It may be further away from the ceiling, but there’s a bigger slope on that side and it leaves the right amount of time to climb the ladder and jump off to land smack-dab on the glass.
Shattering the glass from this height, you’ll drop down onto a slope and want to jump onto the next two platforms. This leads you to a rope that unwinds with your weight and puts you on the ground.
Chapter 13
Bug #3
Push over the scaffolding to the left and steer clear of it as it falls down. Don’t worry about checking out what’s further to the left. You’ll automatically move in that direction when you acquire a brain-altering bug to the right. At first, it’ll move you from right to left, but a little sunlight past the scaffolding will solve the problem of going in the wrong direction.
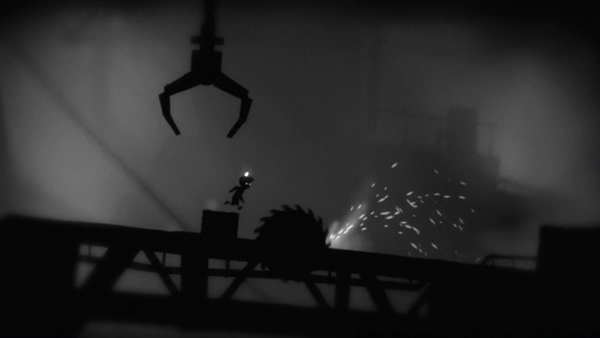 The Saw
A forced, long walk and a couple of platform jumps later, you’ll discover three puzzle elements: a button, a box being held in the air by a mechanical claw and a saw that’s moving from left to right. Hit the button by stepping on it, which slowly releases the box from the clutches of the mechanical claw. Start pressing the left analog stick to the left to similarly slow down your character and allow the box to fall in front of you. Failing to do this will cause it to land behind - or worse, on top of you. Jump onto the box and wait for the saw to approach. Then, jump over the saw right before it cuts through the box (and you).
Make your way back
Beyond the deadly saw is a trio of bird-like creatures that free you from your unidirectional prison. Make your way back by first avoiding the saw, easily accomplished by jumping over it from your high ledge. The best time to jump is when it’s still moving from left to right, but about to switch direction. Don’t let the aid of the high cliff fool you. There’s a small window in which that can be pulled off.
Next, because the platform jumping was easy on the way through the first time, it requires a little bit of puzzle solving on the way back. To reach the higher platform from the lower one, turn the lower platform into a seesaw by shifting your weight on the left side, then the right side, then back and forth again and again until you can make the jump. Now, with just two platforms left, take the handle of the third platform and pull it all the way back. Let it go and hop on to reach the left cliff’s edge.
Chapter 14
 Elevator Madness
Moving left, you’ll see an elevator and, beyond this, a box to the left. Drag it to the elevator, press the up switch with the X button and hop on. Push the box to the right so that it lands on the second level. To earn the "Urban Exploration" Achievement, you'll need to reach the top of the elevator while it’s ascending. Remaining on the second level, send the elevator back down. Send it up again and quickly jump to the moving elevator's roof using the box. With the elevator ascending, jump and cling to a rope on the left. The Achievement will fall to the ground, but don't follow it down from this height. Hop to the elevator and safely ride it back to the ground. The Achievement will be to your left.
Back on the second level, there’s a seesaw in the middle of the platform, meaning you won’t be able to push it too far. There’s no second box to act as a counterweight and your body weight isn’t sufficient enough to lift the seesaw’s right side to continue pushing the box. The makeshift solution is to use the bottom platform of the elevator. Hit the X button to lower the elevator to the ground, thus extending the platform’s reach. Before it fully descends, grab the handle of the bottom platform and start dragging it right. Place it on the left side of the seesaw and continue to push the box to the right.
Flip the lever you come across and position the box under the rope that appears. Flip the lever back to its initial direction so that the rope rises up, climb the box and catch a ride with the ascending rope. Jump right to the next platform and puzzle.
There are two mechanical claws holding boxes in the air and two release buttons. There’s also a lovely saw ready to move from left to right as soon as you step on one of the release buttons. In addition to wanting to hop over the large saw, your goal is to reach the high cliff to the right. Stack the boxes by hitting the first release button, waiting four and a half seconds, then hitting the second release button. As soon as the first box falls, push it underneath the claw that’s about to release the second box. Climb your box tower before it’s shredded to pieces and take safety on the right ledge.
There’s a ladder that continues on to the next puzzle, but take the dark tunnel to the right for the “Alone in the Dark” Achievement. You won't be able to see the ground for the next 30 seconds, but keep moving right until you fall into a shallow pit. At that point, jump to the right and keep walking until you increase your Gamerscore by ten.
Chapter 15
 Mario Ghost
Climbing a ladder leads to a small valley containing a large fly. Like a Boo ghost in a Super Mario game, it’ll approach you when your back is turned. But, approach it and it’ll retreat in a second. The trick here is to walk toward it ever so slightly until you reach the edge of the shallow pool. Remember, baby steps. When you’re that far, run toward the fly and jump. You’ll automatically cling to one of its legs and be flown up.
 A tire, a box and a cog walk into a bar
The goal of the next puzzle is to place a box underneath the rightmost platform to reach a lever, and then flip it to get a cog rotating. Of course, to do this, there are a bunch of complicated steps. Climb the ladder and move left until you see a switch box. Pressing it releases a tire, which will act as a weight for a pressure-sensitive switch below. The tire travels from left to right, but your only means of getting it across is two moveable platforms. Pull the rightmost platform all the way to the left from its left side. Then, hop over the leftmost platform to flip the tire-releasing switch box. Hop to the right side of the nearest moveable platform to push it to the left and meet the releasing tire. Once the tire is on board, push the platform to the right until you meet the rightmost platform. The tire seamlessly switches platforms and, at this point, you’ll want to move that rightmost platform to the right as well.
Climb down the ladder; the tire is sitting on the ground with the pressure-sensitutve switch to the right. The switch opens a door that is blocking the box you need. But, you’ll want to push the tire up the hill to the left, away from the switch. This will give you time to push the trapped box past the door. The tire has enough momentum to hit the switch twice. The second time the door opens, push the box through so that it lands on the ground and push it to the right. Climb to the rightmost platform via the box and hit the lever to start the cog.
If you’re looking for the “Climbing the Cog” Achievement, before hitting the lever, jump off of the midair platform and onto the teeth of the stationary cog. It’s waiting on the right side and will disappear if you start the cog’s rotation. If you already pulled that tempting lever and don't mind trading a death for an Achievement, set yourself up to be squashed by the cog to start over.
Chapter 16
 The first cog
Once the cog starts moving, drop down to push the box onto the teeth of the cog. It’ll be carried to the other side. You should do the same. Climb the ladder, find a second box and perform the same action. Push both boxes to the right, one resting as far to the right as possible and another on a pressure-sensitive button. It’ll raise a platform along with the first box, which you should jump onto before it gets too high. Climb onto the box and use it to reach the high right edge.
The next puzzle includes a chain rope over an electrified platform and a switch that places the chain in one of two places. The rope seems useless where it starts at the beginning of the electrified platform; swinging and jumping isn’t enough to save your character from hitting the platform and being zapped. Also, the rope is out of reach when it’s motionless in its second position, the middle of the electrified platform. The solution here is to swing on the rope when it’s at the beginning of the platform, jump back to the switch when you’re at maximum momentum and catch the now-swaying chain in the middle.
Chapter 17
 The first magnetic switch box
Pushing a small cog into another larger cog turns the screen counterclockwise. Steer clear of the falling wall panel to the right by walking left. Once the panel is down, however, move to the right and climb another cog. Above, you’ll find a light that’s magnetically holding a box in place. Turn the magnet off by pressing X next to a switch that contains a U-like magnet symbol. Push the box up the hill to the right and turn the magnet back on so that the box is in between the right edge and the left ladder. Hit the switch to the right to open up a door at the top of the ladder, jump onto the box and climb the ladder.
 Avoid the saws and electricity in the counterclockwise room
Beyond the door is a box, a switch, a saw, a rope and several electrified platforms. Hitting the switch turns the screen counterclockwise, so before flipping it, place the box underneath the rope. Flip the switch, climb the box and jump to the rope. As the room spins, the box travels along the electrified platform. When it’s underneath your rope 135 degrees later, press down on the left analog stick to ride the box the rest of the way. The box ride ends when it hits the third saw that you see, so be sure to jump toward the chain to the left well before it gets shredded.
Chapter 18
Avoid the Boulder when the room goes clockwise
Dropping from the chain and continuing along the path, you’ll pass a boulder that’s sitting in a ditch as well as a lever on the other side. Obviously, hitting the lever is going to turn the screen again, this time clockwise, and cause the boulder to tumble your way. Luckily, there’s a box that drops down right before the boulder hits. Push the box to the right edge and, when the screen is in the ideal position, jump to the high right ledge.
Beyond a lamp is a cog and beyond that is another brain-altering bug. It’ll cause you to travel to the left. Use the teeth of the cog to make it back up to the lamp, which will reverse your direction. A large machine press will pound the ground every three seconds. With good timing, you can make it across with ease. The second machine press is larger and a little harder. It pounds the ceiling. Instead of running across the first chance you get, hang from the edge of it to get a better start. Press up on the left analog stick as soon as it retracts from the ceiling and run across. On the other side is a conveyer belt with a series of boxes and bird-like creatures that eat your direction-dictating bug. Use the boxes and the jump button to reach these helpful creatures.
You can continue onward to the right, but now that you’re free to navigate the level yourself, why not go back to see if you missed anything? Between the two machine presses is a ladder. It leads to the appropriately-named “Backtracking” achievement.
Chapter 19
 You want the cogs to go clockwise
Whether or not you go back, both paths lead to the same lever and pair of cogs, one moving clockwise and the other counterclockwise. The lever switches the direction of the cogs, but the thing is, you want both to be spinning clockwise. Flip the lever from the right to the left so that it raises the lower, right cog, making the ladder to the left reachable. However, right before you jump away, switch the lever again. The lever isn’t instantaneous, so you’ll be able to make it up the first cog while it’s still rotating clockwise and onto the ladder before the counterclockwise direction sets in. Now, the second cog should already being going in a favorable clockwise direction. On the topside of the cog, use its teeth to reach the high right edge.
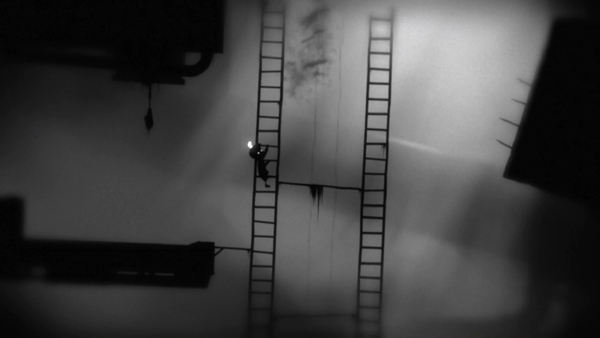
Ladder cart on an electrified platform
There’s another ladder cart next, but this time it’s on top of an electrified platform. The platform is lowered, but can be raised with a switch to its left. Of course, raising the platform also turns on the electricity. First, run past this area until you see a mine cart. Pull it to the left a little bit with the X button and left analog stick. This is in preparation for part two of this puzzle. Travel back to the ladder cart and push it as far as you can to the right. Let go and climb the ladder and jump to the left edge near the electric switch – but don’t hit it yet. Wait until the ladder cart passes the middle of the electrified platform for the second time, on the way back to you. Jump to the ladder and ride it to the second-story platform. There’s a lever at the end you need to jump toward. It’ll drop you down to that clutch mine cart, which, because of your prep work, saves you from hitting the electrified ground.
Action-movie overpass
Ride the cart past the door that you opened with the switch until you see a small ladder. This is one of those action-movie overpass situations in which the hero is riding on the roof of a vehicle before a low-clearance tunnel makes the chase sequence a thousand times more interesting. Climb the ladder while the cart follows underneath, but slow up. There’s a slow-moving saw at the end that’s destroying the platform. Wait for two seconds before making that action hero jump back onto the cart.
 The Mine Cart and electricity-starting button
Hop off of the mine cart when the electrified track runs out and there’s solid ground. Drop to the right side and stop the cart from proceeding. There’s a high electric platform above you and to the right of that is where you want to travel. Letting the cart go means it’ll triggers a switch that powers on the electricity. The trick here is to begin to push the cart to the left underneath the edge of the high platform, hop onto it the first chance you get, jump to the right to land on the platform, and run your way across before the mine cart slams into the electricity-triggering button.
Lights off, swaying lamp
The next lever turns off the lights AND rotates the screen clockwise. There’s one swaying lamp that briefly lights the obstacles, which include a boulder sitting in a gap. Before the boulder falls out and squishes your character, move to the right, but not all the way. There’s a small V-shaped valley where you should wait. You’ll see a ladder to the right and, if you wait, it’ll be reachable just before the boulder comes traveling from the left.
After waiting a couple of seconds for an ideal screen rotation, jump to the second-level platform and avoid all electricity. A box will drop down, allowing you to access the first level. You’re supposed to pull it to avoid the electrified wall to the right and then push it over the left edge to avoid the electrified ground below. However, prior to moving the box, climb on top and jump to the platform to the left. It’s shrouded in darkness, but, trust us, it’s there. From that left unseen platform, jump over the electrified wall to the right and find the “Guided By Sparks" Achievement.
Chapter 20
 Guns
GunsThere are two guns that, when they detect your presence, shoot a stream of bullets from the top and left sides of the screen. The gun at the top moves, so jump in front of it (they don’t shoot right away) to lure it to the left side, where the first gun is located. After tricking it twice, the top gun should wipe out the left gun, allowing you to continue to the right.
Chapter 21
Working with Gravity
The next, and possibly most complicated puzzle of the game, involves a timed, pressure-sensitive gravity button and two boxes. Push the rightmost box up the right hill. In the process, you’ll set off the pressure-sensitive gravity button that reverses the orientation of gravity for the box on the left half of the room. This doesn’t matter yet. Keep chugging along and pushing that first box up the right hill. When it’s up as far as it can go, run back down, jump over the gravity button and use the remaining box to return to the high ledge to the left. When the first box returns to the bottom of the hill on its own, it’ll send that remaining box into the air. Because the ceiling is curved, the box will conveniently land to your left. Allow the gravity timer to run out and push it further left, underneath the previously inaccessible ladder to reach the second story.
On the right side of the second story is another ladder that, upon touching it, falls to the ground where the gravity button is located. Push the first box up the right hill again and climb the ladder back to the second story and run to the left to drag the gravity-reversed box onto the second level before it falls from the ceiling back to the first. One more time, push that first box up the right hill, climb the ladder and hop on the second story box. As soon as the gravity reverses, the box, along with your character, will be carried to the ceiling. Be sure to run to the right past the previously inaccessible door before you get caught between the ceiling and the box.

The next puzzle isn’t as hard as the previous, but it does, unfortunately for you, take on the prestige of being the second-hardest puzzle in the game. Hit the elevator switch to lower the elevator and, once it’s on your level, hit the switch again to raise it while jumping on at the last second. Hit the top elevator switch to lower it (without being on it this time) and hit it once more to raise it right before jumping onto the roof. There’s a proximity-sensing gun that’ll detect you as soon as the elevator ascends. Just before it goes off, jump down to the right. The bullets will hit a rope that’s holding a crucial box in the air.
Lower the elevator and push the box onto the roof. Raise it and jump onto the roof without worrying about the gun. It won’t detect you behind the box. Jump on top of the box to the ledge above the gun. Here, you’ll find a gravity-reversing switch and a box that’s stuck in a room. Work the box out of the room by turning the switch on and off and manipulating gravity. Just be sure to never let the box hit the ceiling or else it’ll slide back to the beginning. Once it’s on the ground, push the box as far to the right edge as you can. Jump down to the elevator roof and push the first box to the left. Don’t follow it to the left because you likely won’t survive the drop. The safer choice is to fall to the right side. Either way you drop, clear the elevator roof immediately, as the gun will go off in two and a half seconds.
With the elevator raised, you can earn the “Under Ground” Achievement by pressing the left analog stick down to lower yourself down the cliff. Jump to the right to hold onto the rope that travels down the middle of this dark passageway and jump on the glowing Achievement to the right before climbing back up.
Lower the elevator, push the box on, and raise the elevator for the last time while catching a ride up. Push the box all the way to the right to avoid another gun and reach a ladder. At the top is a reverse gravity arrow that reverses gravity for both boxes and you. Hit it to fall to the ceiling along with that box you just pushed. For the next obstacle, though, one box isn’t enough. Run back to the left to retrieve that second box you pushed as far to the right as possible. Although it was stuck against a ridge when gravity was in place, reverse gravity put it on the ceiling and lets you push it further along to the right.
There are two rectangular platforms and the bottom one is constantly expanding and retracting into the top platform. With gravity reversed, push one box so that when you flip the switch back to normal gravity, it’ll land on the moving rectangular platform. The other box should land on the ground. This creates steps so that you can move to the subsequent ladder and shimmy down it without the inconvenience of reverse gravity.
Chapter 22
 Two platforms box you out
The next room contains two large blocks, one on the left and another on the right. Both block your path to the final two chapters of the game. While there’s a gravity box that can send them into the air and a magnetic box to make them stay in the air, you need the first block be in the air and the second to stay on the ground. Here’s how you do it: skip the gravity box and turn on the magnet box to the right. It won’t do anything just yet. Going back to the gravity box and turn it on for half a second. That will be enough time to cause the first block to reach the magnet and stick, but not enough time for the second block to stay in the air. Jump to the accessible platforms and proceed.
There’s a full gravity-reversing arrow ahead of a zip-line to the right. Reverse gravity once to send the zip-line rope your way. As it’s traveling toward you, hit the gravity button again and run toward the rope. You’ll have to make a SportsCenter-worthy leap to complete this puzzle. Once you’ve successfully execute the jump, don’t celebrate just yet. Hanging on to the rope will send your character into spikes that are waiting for daydreaming gamers at the end of the zip-line. Jump down before you become impaled.
Chapter 23
 Putting the H-O in H-O-T-E-L
Slide down the next hill and jump, aiming for the gravity-switching arrow sign. Be sure to remember to hit the X button to cause it to send you the right way. There’s a saw that’ll chase you up the next vertical platform, so jump off of the top and aim for the next gravity-switching arrow. Just be sure to time the landing because you’re going to be falling on a sporadically electrified letter H. Make your way around the sideways H whenever it won’t electrocute you and, once you reach the dormant O, take a right. There’s no T-E-L this time around.
You’re very close to the “Going Up” Achievement, which is located in a secret room above you. Go a little further and hit the next gravity-switching arrow you see. A box will fall. It’s another puzzle-crucial box, but don’t worry about it now. Now on the ceiling, climb over it and back to where you just were before you leapt for the gravity arrow. You’ll fall into a small room in the ceiling that contains a handle. Pull the handle to reveal a platform and out pops a glowing Achievement.
Gravity will reverse as this happens, so make your way back to the arrow, hit it again and drag the box to right. You won’t be able to push it all the way to the right and jump to the next area, so scamper back to the left ledge before gravity goes back to normal. Hit the gravity arrow again if the box is far enough along and speedily run as far to the right as possible. There’s a saw on the ground waiting for gravity to return and to chop you into bits if you aren’t fast enough.
Chapter 24
 To boldly go where no shadow character has gone before: The Final Chap-tier
If you make it past the saw, you’ll land on a slope. Jump from this slope to the next gravity-reversing arrow and land on the next ceiling. Once you’re between the ceiling and some solid ground, take a breath. Gravity will continue to reverse from top to bottom every five seconds. You’ll want to turn off the magnet that’s holding a large block in place, but, to do that, you’ll have to hit it right before gravity reverses. With the aid of reversed gravity, the proximity-sensing gun near the magnetic box won’t catch you, so leap for the box and hit the X button four seconds into the countdown. Position yourself near the block and run across it as soon as the path isn’t obscured anymore. While it’s no longer magnetized, gravity is still switching every five seconds, so it’ll still squish your character if you aren’t fast enough.
Three seconds into gravity being changed from normal to reverse, drop down from the next platform. There’s a gun that’ll shoot you on the ground, but, with gravity reversed, the bullets won’t reach your character. Head through the opening and drop down onto the next slope. When normal gravity is in place, jump to the next ledge right before it switches. There’s a saw above and below you, but you have the handiness of manipulating gravity to sort of stay in the middle for an extra second.
The last and final puzzle also requires you to manipulate gravity at the last second. From the ceiling, jump up toward the gravity-reversing arrow when there’s about three seconds left in reverse gravity mode. Don’t hit the X button and switch gravity just yet. We did that for you a million times before we figured this one out. Float past the arrow once and wait until gravity returns to normal so that you pass it a second time. That’s when you hit the X button, throw down the controller and begin to look at the world and the fact that it has color. Your eyes may need a minute of adjusting. Witness the incredibly brief ending and, if you earned the “complete the game in one sitting with five deaths or less achievement,” pat yourself on the back. We hope that we helped.